Hi,
I’m new to gmt and pygmt.
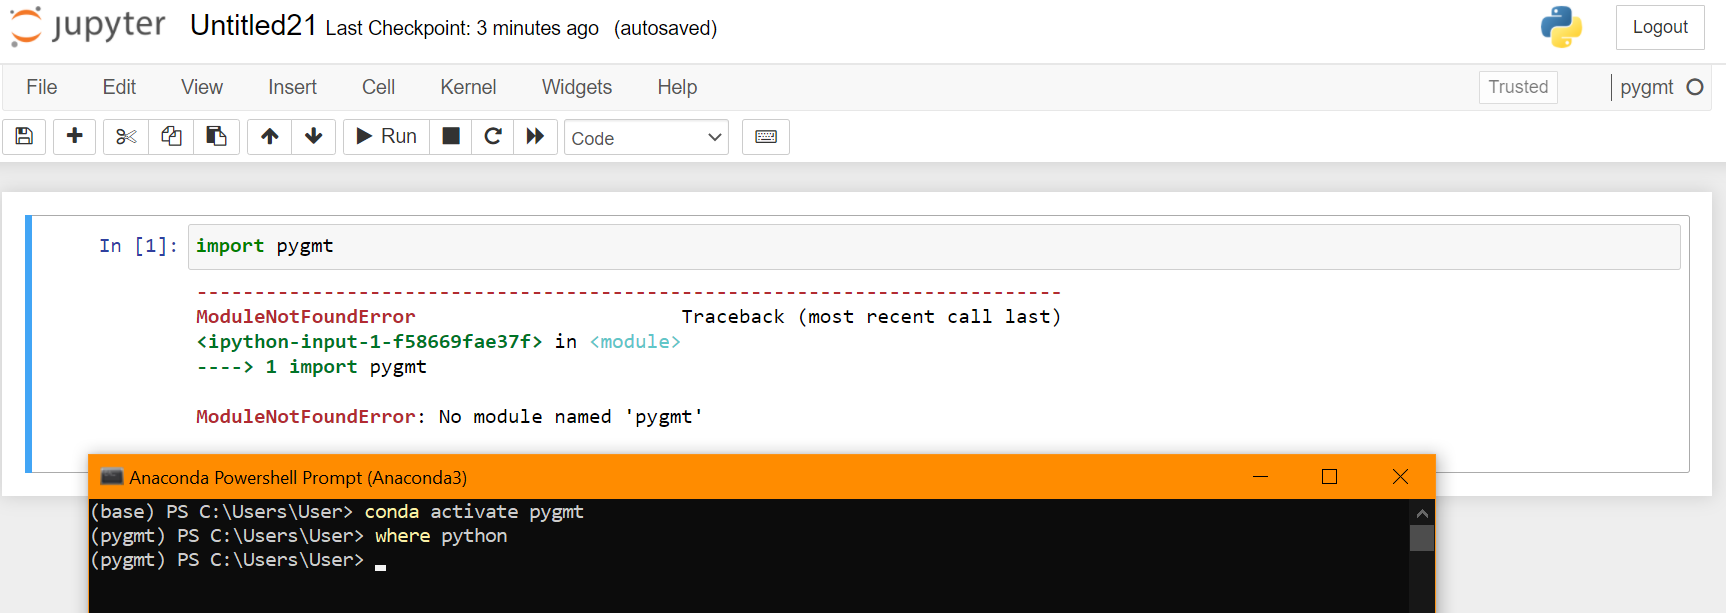
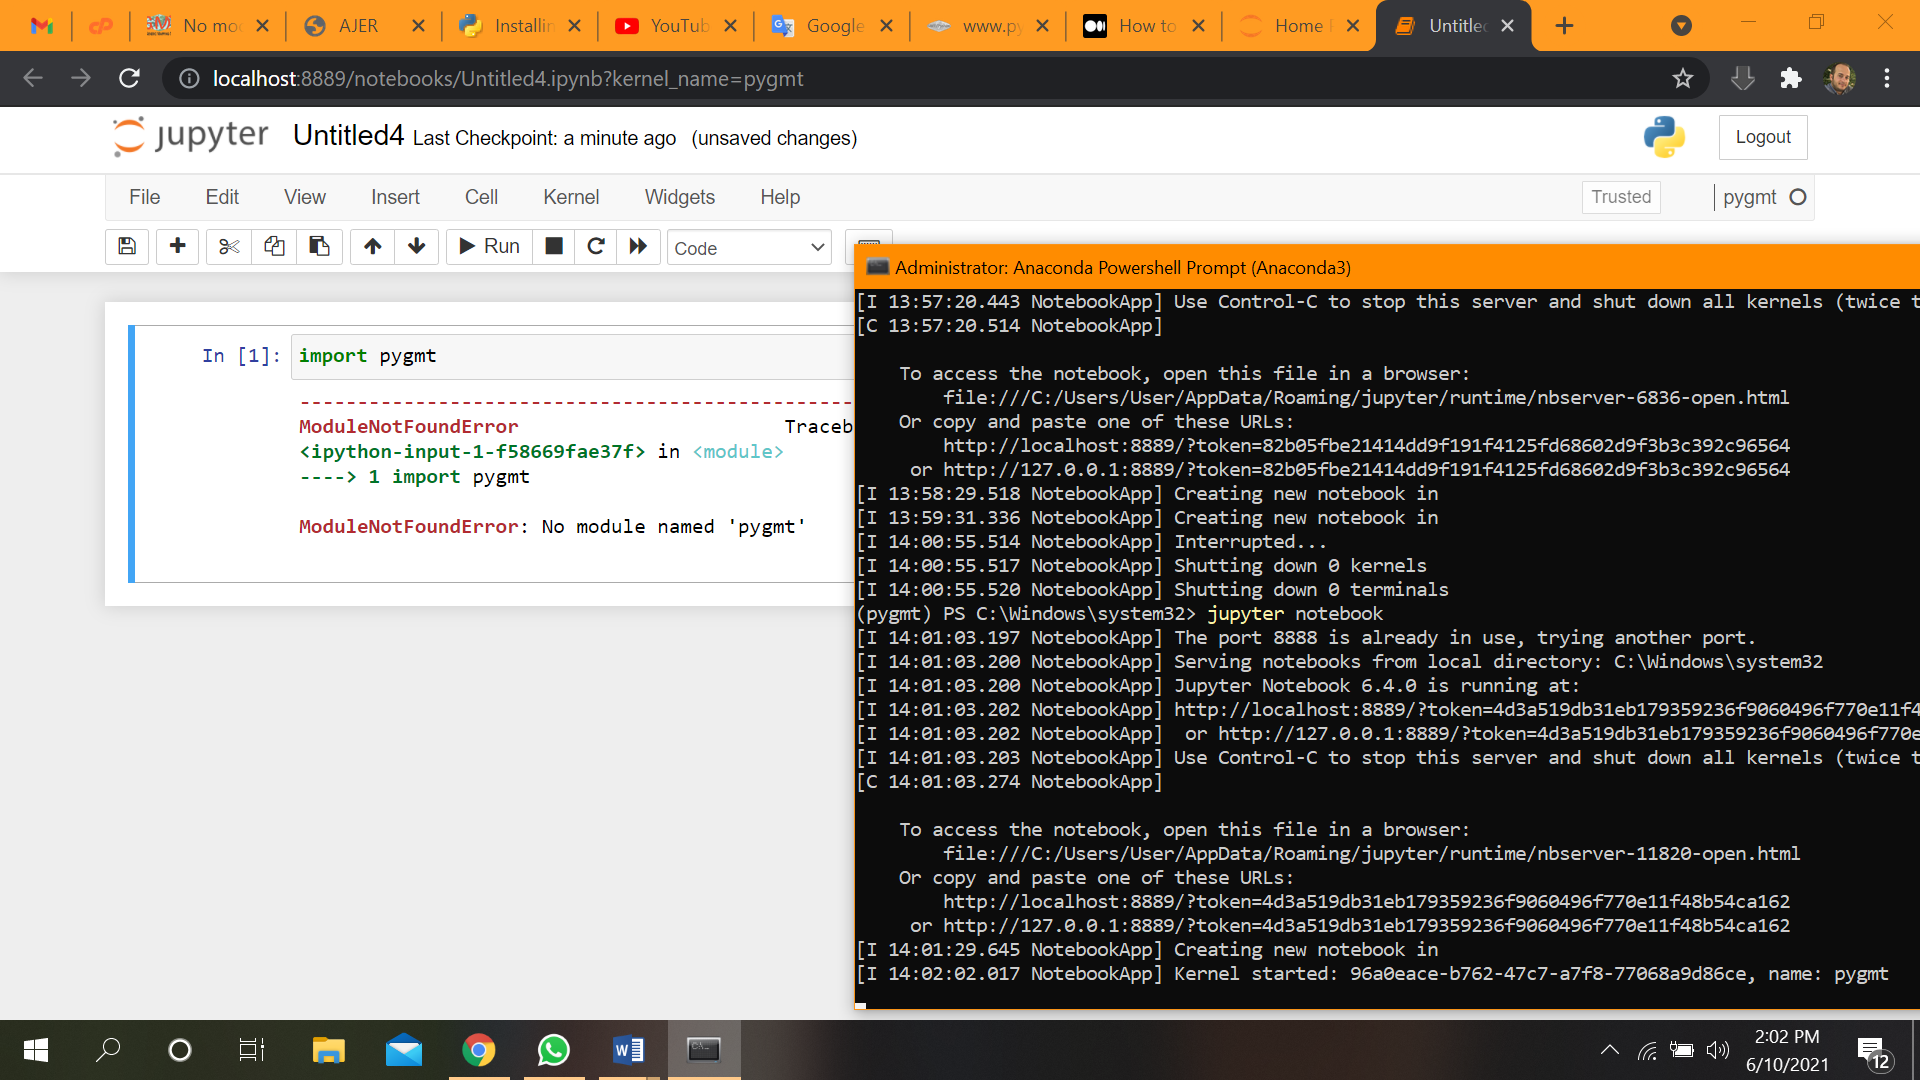
I tried installing it according the scripts for anaconda but when i try to test it it doesn’t recognize pygmt as a module.
Removed and reinstalled anaconda and its packages and then reinstalled pygmt.
Now i got pygmt as a kernel but yet i get the same result when i try to import pygmt .
I am using windows 10.
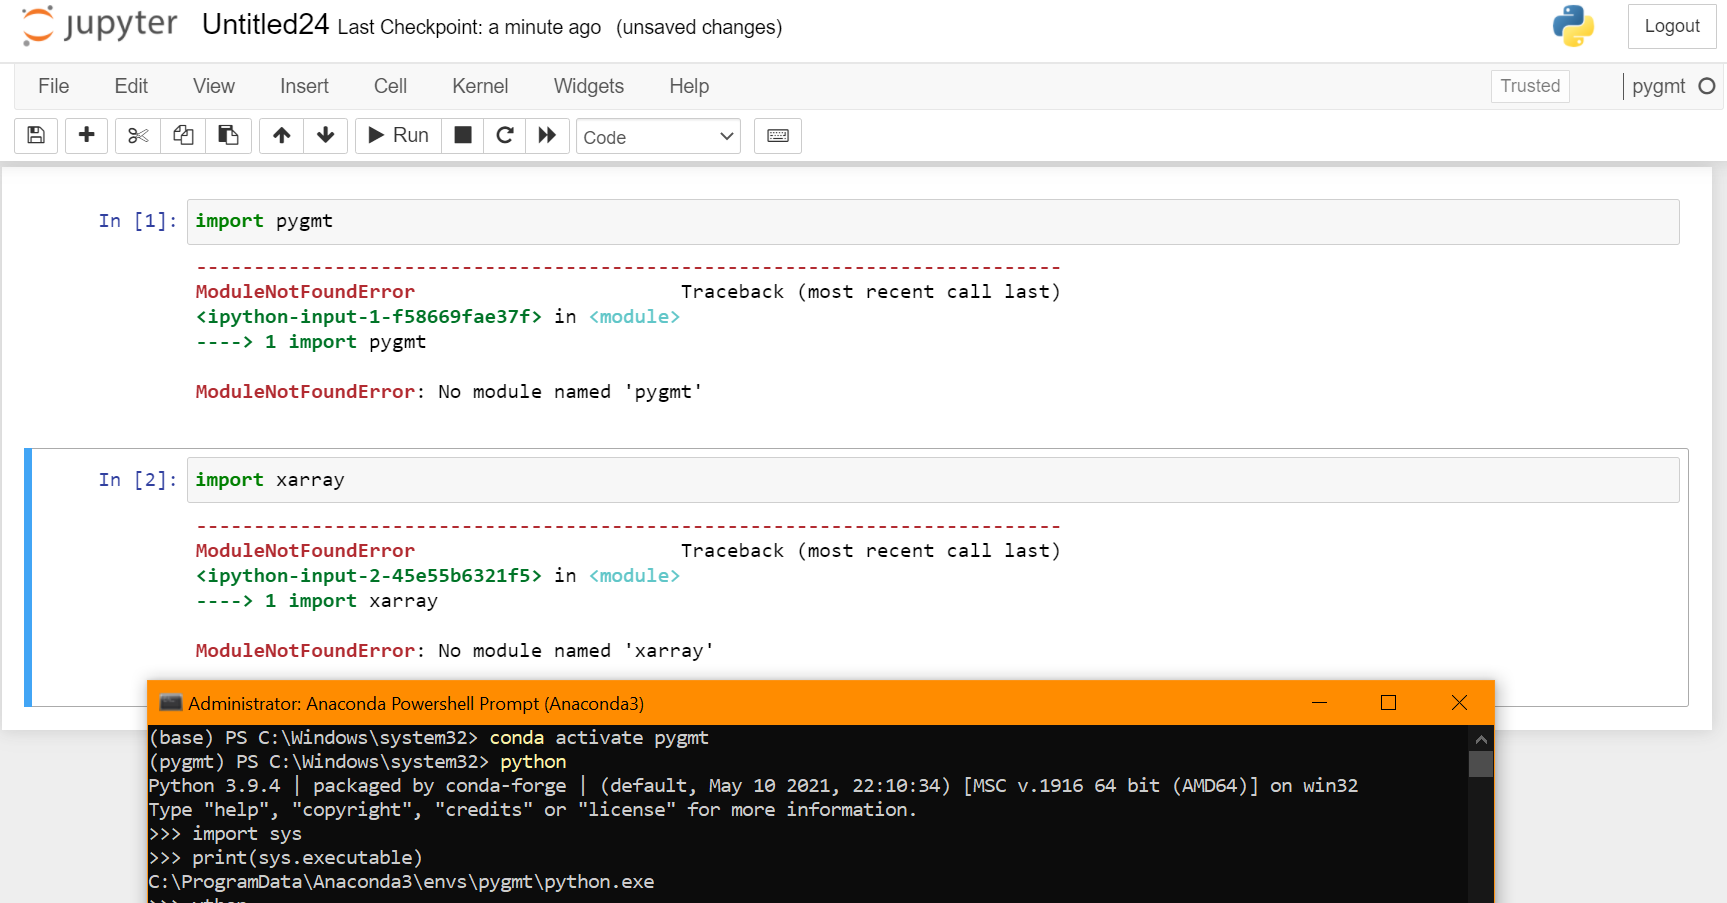
For me, this returns a string that is clearly the python interpreter in the conda environment (C:\Users\User\anaconda3\envs\pygmt\python.exe). If your python.exe is not inside the pygmt conda environment folder, you need to update your path.
For debugging, it would also help if you can post whether this problem is unique to pygmt or extends to other packages in the conda environment. For example, xarray should be installed in the pygmt env, so this should work:
Is the error inside Anaconda Powershell Prompt the same as in the Jupyter Notebook? In other words, do these command in Powershell give the ModuleNotFoundError:
(base) PS C:\Windows\system32> conda activate pygmt
(pygmt) PS C:\Windows\system32> python
Python 3.9.4 | packaged by conda-forge | (default, May 10 2021, 22:10:34) [MSC v.1916 64 bit (AMD64)] on win32
Type “help”, “copyright”, “credits” or “license” for more information.
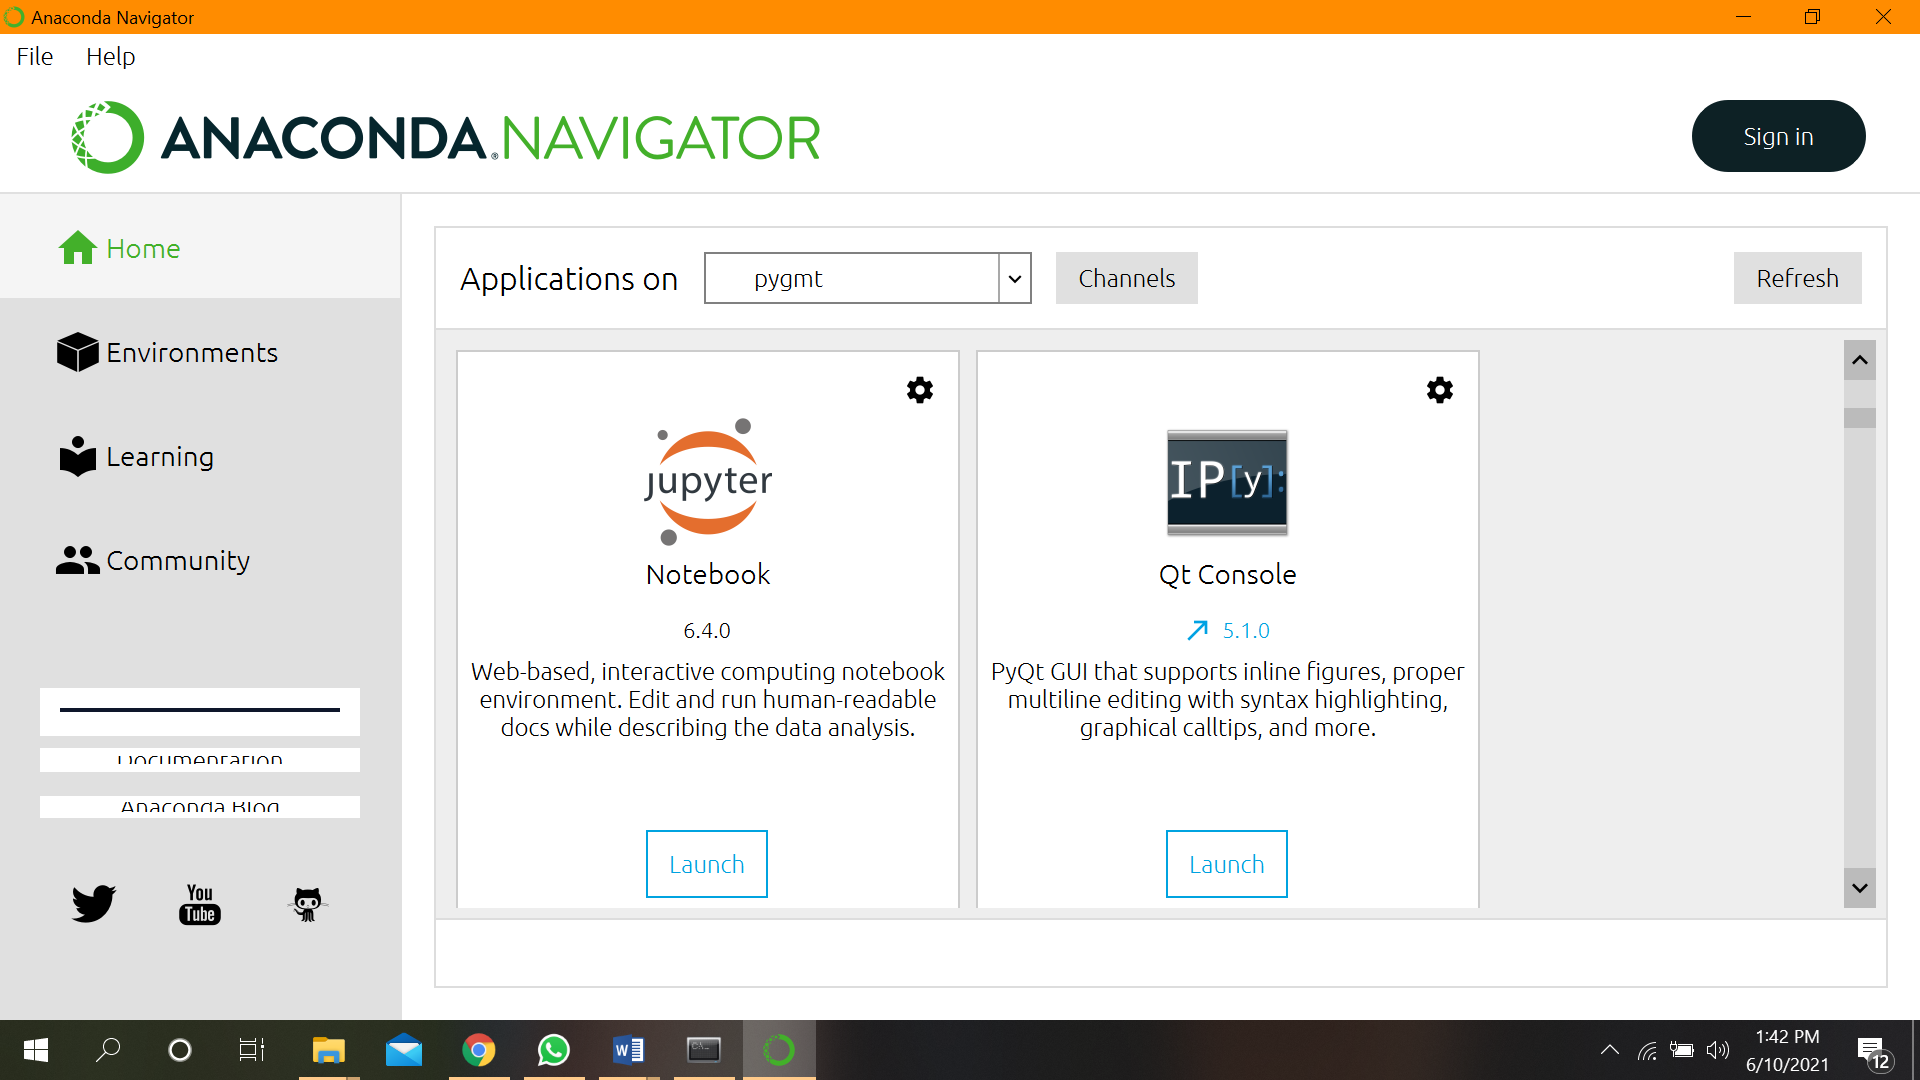
OK, so it seems that the Jupyter Notebook that you opened is not associated with the conda environment. If you are opening Jupter Notebook through anaconda navigator, make sure the dropdown menu next to Applications on says pygmt (screenshot below).
Or you can open jupyter notebook from the Anaconda Powershell after activating the pygmt conda environment. I recommend navigating to the folder that you’ll working in before entering the jupyter notebook command.
Please note that, if you install PyGMT following the official install instructions (https://www.pygmt.org/latest/install.html), your pygmt environment won’t have Jupyter or jupyterlab installed, because Jupyter/JupyterLab is not a required dependency of PyGMT.
The jupyter notebook you’re running may come from another environment (e.g., base), even though you already activate the pygmt environment.
Thank you all for the effort.
I had noticed that jupyter notebook wasn’t installed in the pygmt directory in the anaconda navigator and when i tried to install it from there it encountered multiple errors, as it stated in the notified error.
i tried today after your instructions and as expected whet i tried to open it from anaconda directly it gave and error and didn’t open.
then installed notebook in the pygmt environment and checked in the navigator as it showed installed
I am not sure where the problem is. The steps listed below work for me on Windows 10 with Anaconda 3 Powershell, if you want to try once more. The steps listed include jupyter lab, with a commented out version for classic jupyter notebook instead of jupyter lab. I was able to successfully import pygmt in jupyter lab and jupyter notebook after a clean install with these steps.
I did get errors if I tried conda install jupyter rather than conda install -c conda-forge jupyterlab or conda install -c conda-forge notebook.
cd ~\Documents
mkdir pygmt-test # New dir to test installation
cd pygmt-test
conda update conda # update conda to the latest version
conda remove --name pygmt --all #start from scratch; may need to press enter after seeing 'done'
conda info --envs # check that environment has been deleted
conda create --name pygmt --channel conda-forge pygmt # Retry installing pygmt using conda
conda activate pygmt # activate pygmt environment
conda install -c conda-forge jupyterlab # add jupyter lab to environment
jupyter lab
# conda install -c conda-forge notebook # Use the classic Jupyter Notebook install
# jupyter notebook
that was a very detailed procedure, thank you a lot, really!
I did it and i didnt work.
then i thought it might be because of these many installations, so i uninstalled anaconda entirely. first with anaconda clean, then removed envs and pkgs and then the uninstallation from control panel.
and then reinstalled it, updated it, then installed pygmt.
after activating pygmt installed jupyterlab and notebook.
after opening a new pygmt notebook i got a kernel error.
checked around and found that it might come from early installed envs so i found that directory, removed it and then installed ipykernel and installed pygmt to notebook again.
tried to import pygmt again and it didnt work, still get no module pygmt.
this time, when i try to import xarray i dont get an error, it is imported. just pygmt doesn’t find the module…
Thank you again for your time!
Hello, I have encountered the EXACT same problem using Mac Today (Feb 2023).
Fortunately I was able to resolve it. Although I must be too late to help the person asking, I hope this helps others in the future.
I tried everything you guys did too and nothing worked. The issue is that Jupiter won’t work in the pygmt environment.
Trying to install jupyter in anaconda will not work either.
The steps are as follows in the Terminal.
#1 activating pygmt envs
conda activate pygmt
#2 installing pip
conda install pip
#3 installing JN
pip3 install jupyter
I closed everything and relaunched the terminal ( also closed anaconda) to check if it works. activate pygmt and then write down jupyter notebook as a command in the terminal. it should open it now. The kernel took few minutes to work the first time and then it successfully imported all modules.